ReactNative Tutorial
ReactNative Tutorial
Getting Started
Environment
1.nodejs
1 | brew install node |
2.npm4 why not npm5?
1 | npm install -g npm@4 |
3.yarn
1 | brew install yarn |
4.watchman
1 | brew install watchman |
watchman permission : sudo chown -R $(whoami) $(brew --prefix)/*
5.react-native-cli or create-react-native-app
1 | npm install -g react-native-cli |
Run it
1 | react-native init ReactNativeTutorial |
1 | react-native run-ios |
Android issue
- ./android/gradle/wrapper/gradle-wrapper.properties
- ./android/build.gradle
- ./android/app/build.gradle
- ./android/local.properties
- touch ~/.gradle/gradle.properties && echo “org.gradle.daemon=true” >> ~/.gradle/gradle.properties
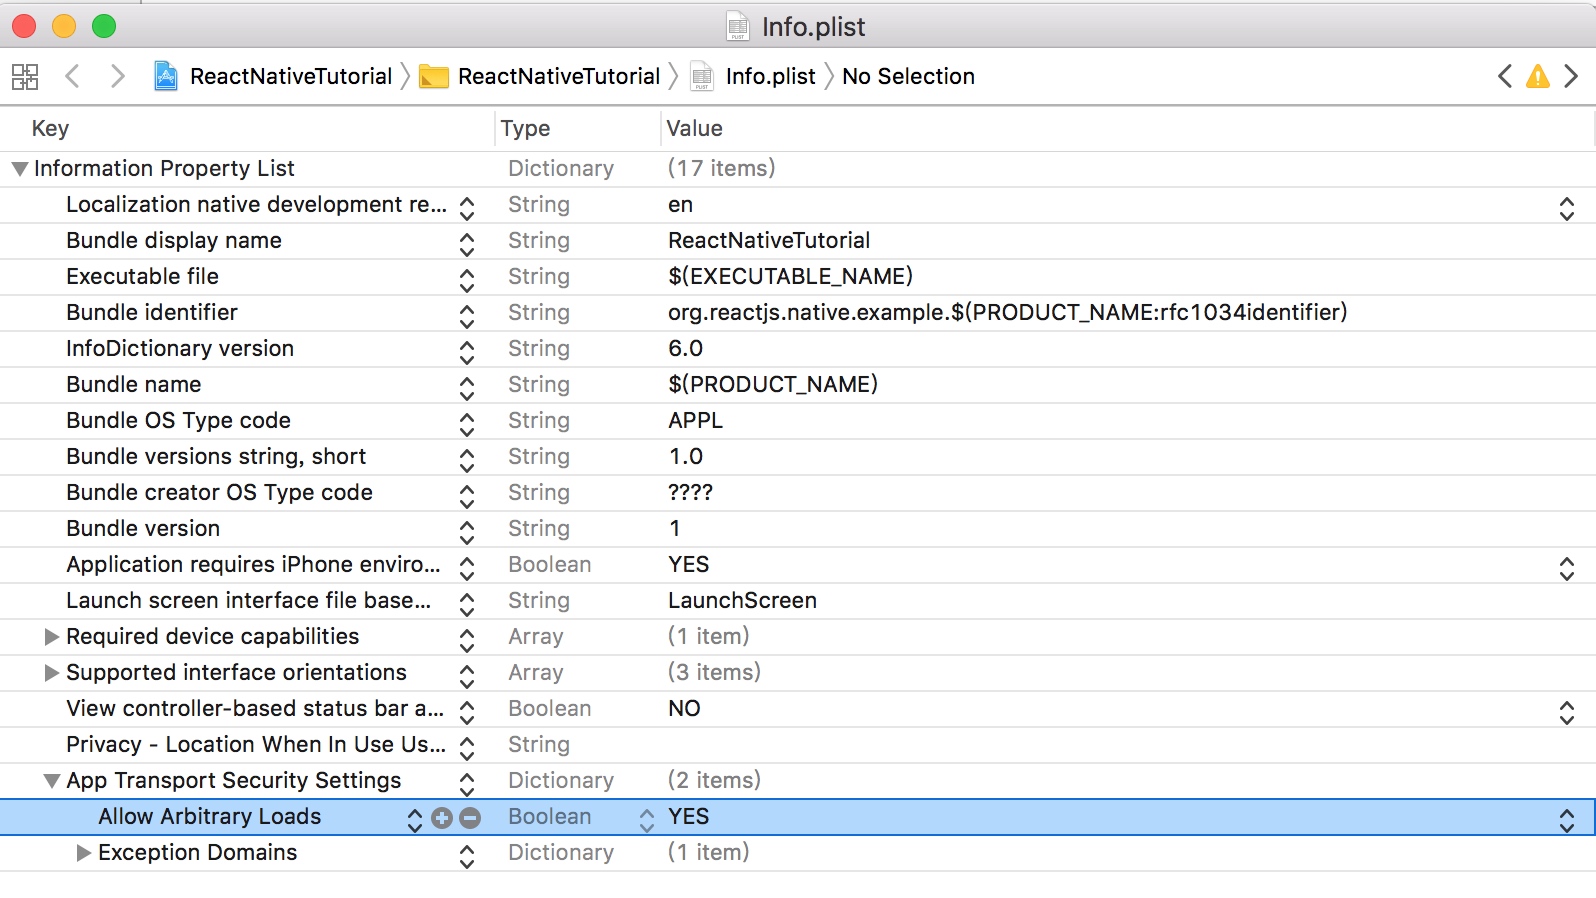
iOS issue
- xcrun: error : Xcode/Setting/Location -> Command Line Tools
Developer Menu
How it works
ES6 标准
Modules
1 | import React from 'react'; |
Classes & Method
1 | class Photo extends React.Component { |
Property initializers
1 | class Todo extends React.Component { |
State
1 | class Todo extends React.Component { |
Arrow functions
1 |
|
Dynamic property names & template strings
1 | const name = "Bob", time = "today"; |
Destructuring & spread attributes
1 | class Todo extends React.Component { |
Default Parameters
1 | function test(height = 50, color = 'red') { |
Component
1 | class CustomComponent extends Component { |
JSX
1 | class CustomComponent extends Component { |
props & state
1 |
|
Lifecycle
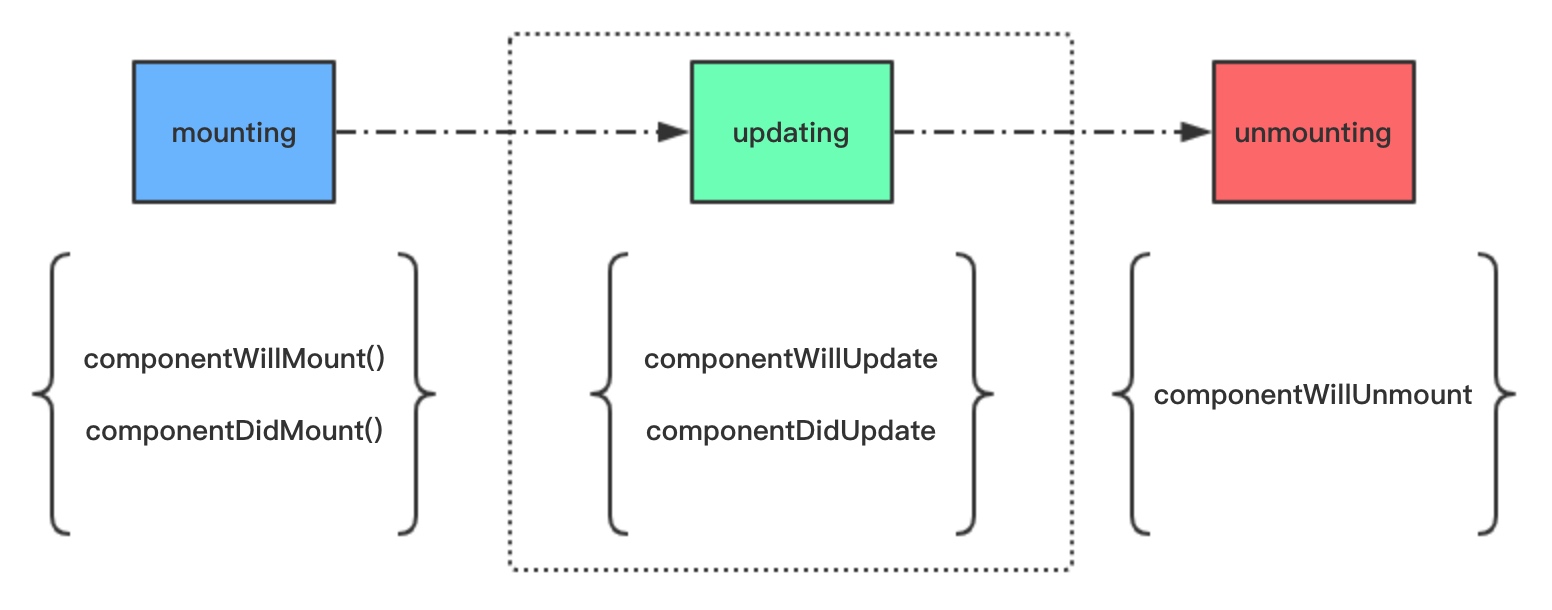
1 | // 组件开始装载之前调用,在一次生命周期中只会执行一次。 |
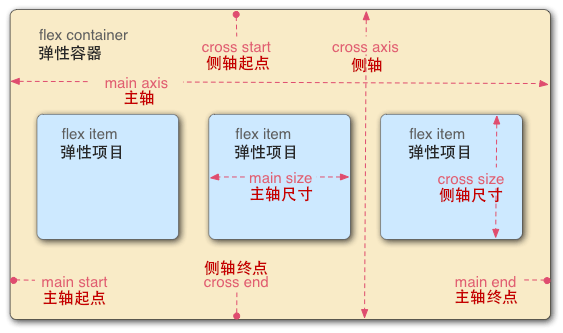
Style & FlexBox
组件使用
Image
本地图片
1 | <Image source={require('./assets/email.png')}/> |
Packager 会打包所有的图片并且依据屏幕精度提供对应的资源。比如: iPhone 6 会使用 email@2x.png,而 Pixel 上则会使用 email@3x.png。如果没有图片恰好满足屏幕分辨率,则会自动选中最接近的一个图片。
网络图片
1 | <Image source={{ uri: 'https//assets.domain/xxx.jpg'}} |
ListView
1 | <ListView |
Animation
Network
React Native 提供了和 web 标准一致的Fetch API
1 |
|
AsyncStorage
是一个简单的、异步的、持久化的 key-value 存储系统,它对于App来说是全局性的。它用来代替 LocalStorage
1 | async saveUserName(account: String) { |
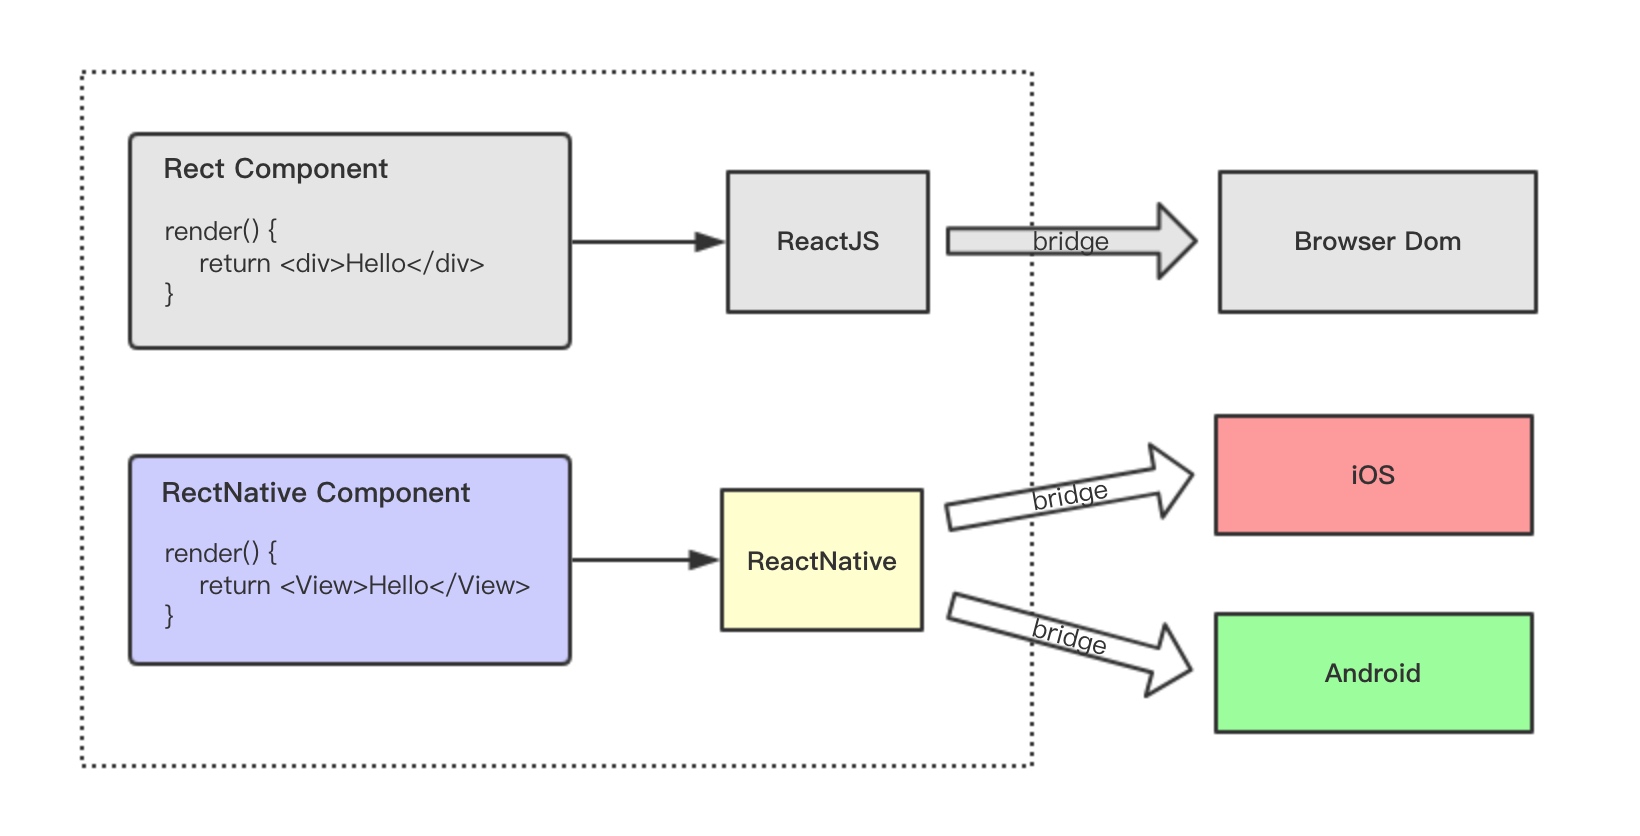
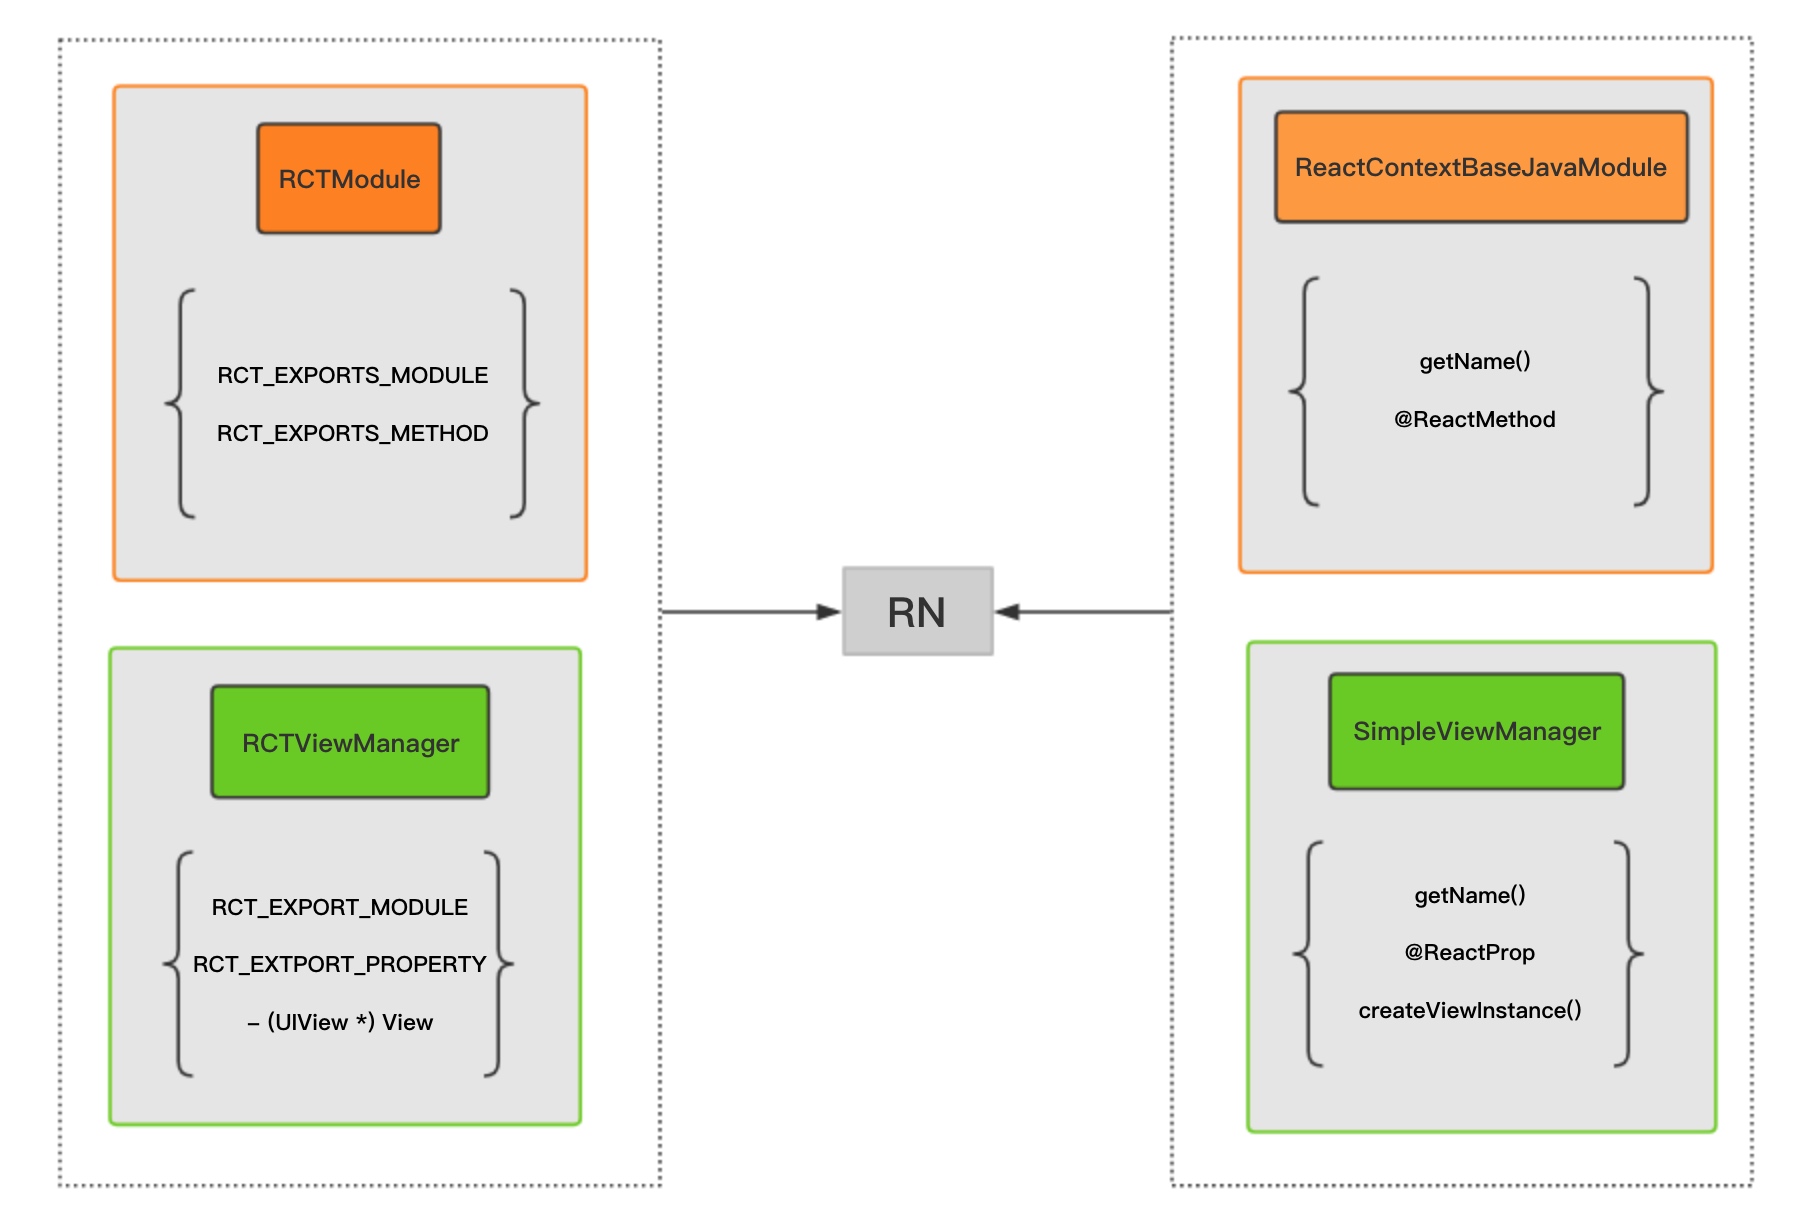
NativeBridge
打包
iOS
1.执行打包命令
1 | react-native bundle --entry-file index.js --platform ios --dev false --bundle-output release_ios/main.jsbundle --assets-dest release_ios/ |
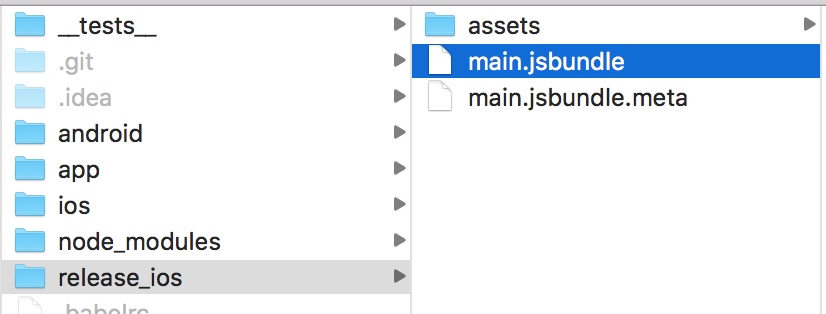
2.将 assets 与 main.jsbundle 添加到项目中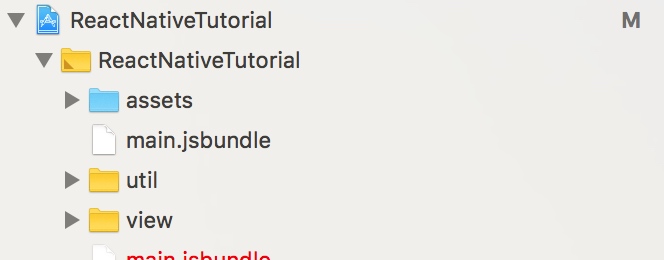
3.修改 AppDelegate.m,让 React Native 去使用我们刚才导入的 jsbundle
1 | - (BOOL)application:(UIApplication *)application didFinishLaunchingWithOptions:(NSDictionary *)launchOptions |
4.在 iTunes Connect 创建应用 ➜ 打包程序 ➜ 将应用提交到app store
Android
- 生成证书
- 配置gradle
1 | android { |
3.打包 APK
1 | ./gradlew assembleRelease |
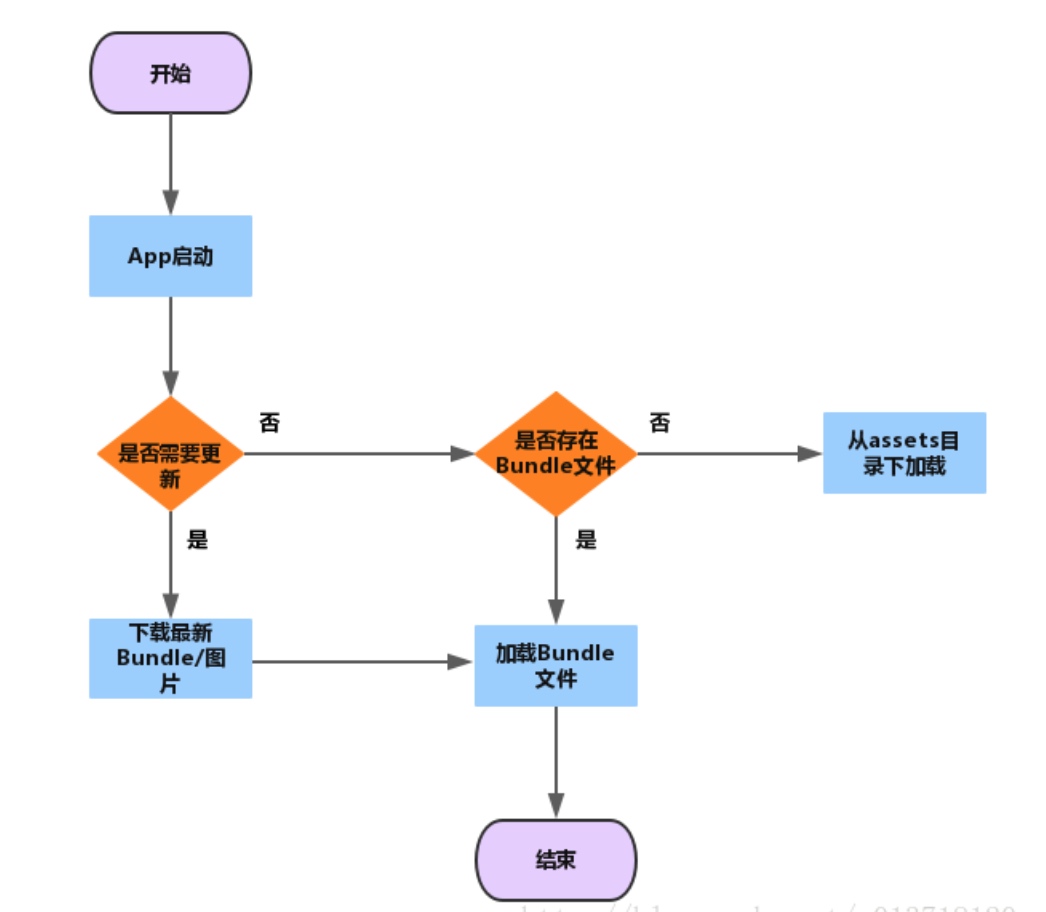
热更新
codepush
https://microsoft.github.io/code-push/
自己实现
以 Android 为例
1 | react-native bundle --entry-file index.js --platform android --dev false --bundle-output release_android/main.jsbundle --assets-dest release_android/ |
- 1.初始项目发布时,生成并保留一份 bundle 文件。
- 2.有版本更新时,生成新的 bundle 文件,
- 3.使用 google-diff-match-patch 对比两个文件,并生成差异补丁文件。
- 4.App 下载补丁文件,再使用 google-diff-match-patch 和 assets 目录下的初始版本合并,生成新的 bundle 文件。